
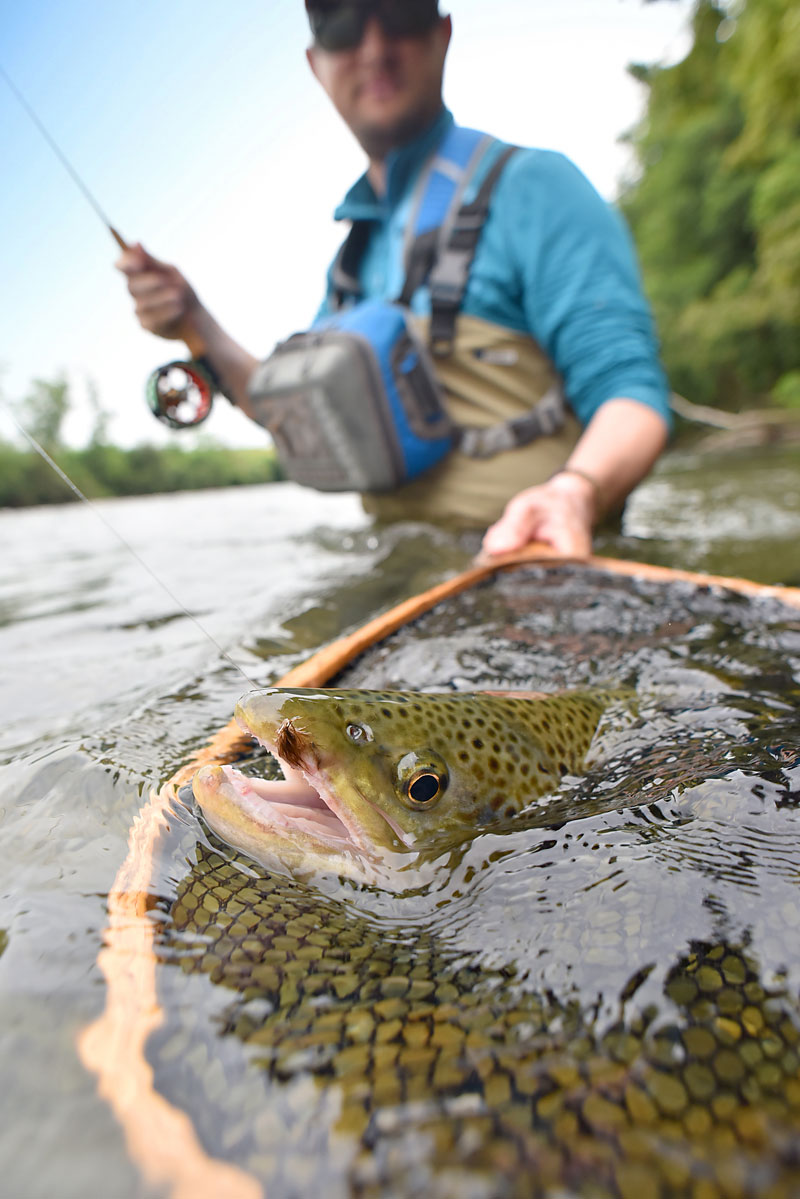
Many fishermen who tie their own flies would have you to believe that it involves infinite skill, that only a chosen few can do it successfully. Dispel that myth, and you get on the path to creating your own flies and fishing them successfully.
The first step in learning to tie flies is to have the necessary equipment. The most basic item is a fly-tying vise. It is advisable to invest a few dollars and purchase a rotary vise. The advantage is that the jaws of the vise may be rotated to wrap dubbing or thread around the hook. It is much faster and easier to use than a vise with stationary jaws.
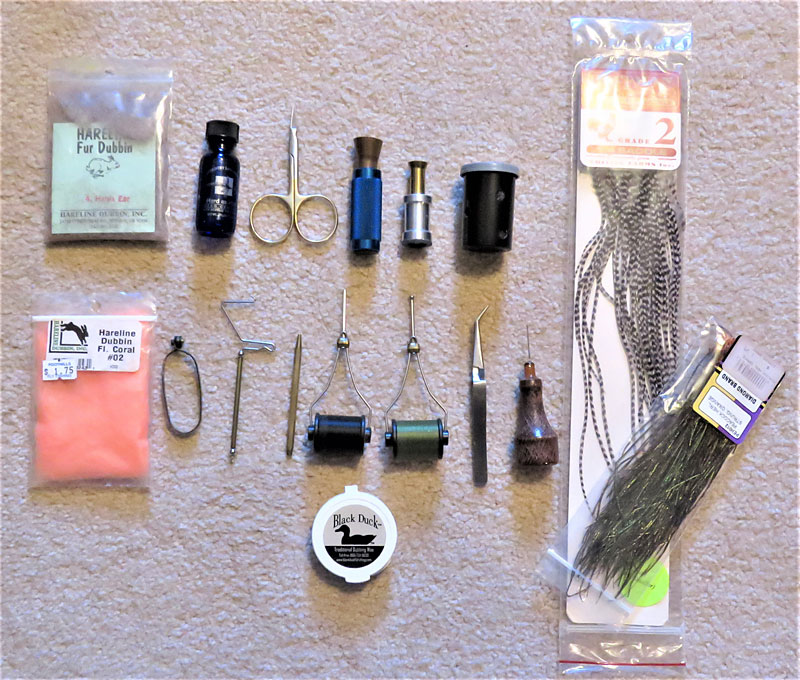
My favorite vises are Renzettis, which start at around $160. I use a clamp vise on my fly-tying bench and a Renzetti Traveler for a travel vise. You can purchase less-expensive brands for less than $100, and non-rotary vises for less than $20. They all accomplish the same task: to securely hold the hook horizontally so you can attach a thread base, dubbing, feathers or other materials to make an imitation insect will attract fish. The rotary vise merely speeds up and simplifies the process.
The tools and materials that you will need to begin the process of tying flies include:
- Bobbin. This holds the thread and maintains tension for even thread application. A bobbin threader is necessary; its use is self-explanatory.
- Scissors. Small, sharp scissors are desirable. For some tasks, straight blades are best, for others, curved blades are helpful. Start with straight blades.
- Half-hitch tool. Used to quickly tie half-hitch knots to secure thread near the eye of the hook.
- Tweezers. Used to pick up small items such as hooks, beads, etc.
- Hair stacker. Used to align deer, moose or other hair for evenness before applying to the hook.
- Whip finisher. Finishes off the head of flies rapidly.
- Dubbing wax. Simplifies applying dubbing to thread before it’s wrapped around the hook.
- Head cement. Secures thread at the eye of the hook.
- Hackle pliers. Holds the end of hackle to be wrapped around the hook.
- Thread. 6/0 and 8/0 Uni brand thread, specialty threads, wire, lead wire, etc.
- Hackle. Long feathers taken from the backs of chickens, used to create flies.
- Dubbing. Synthetic and natural materials, often blended, to be wrapped around thread to add bulk and create the body of flies.
The object of fly-tying is to imitate insects that appeal to fish. This is accomplished with a variety of hackle, dubbing, hair and various synthetic materials that provide flash or other attributes that are attractive to the fly. Certain attributes are triggers that cause fish to react or strike.
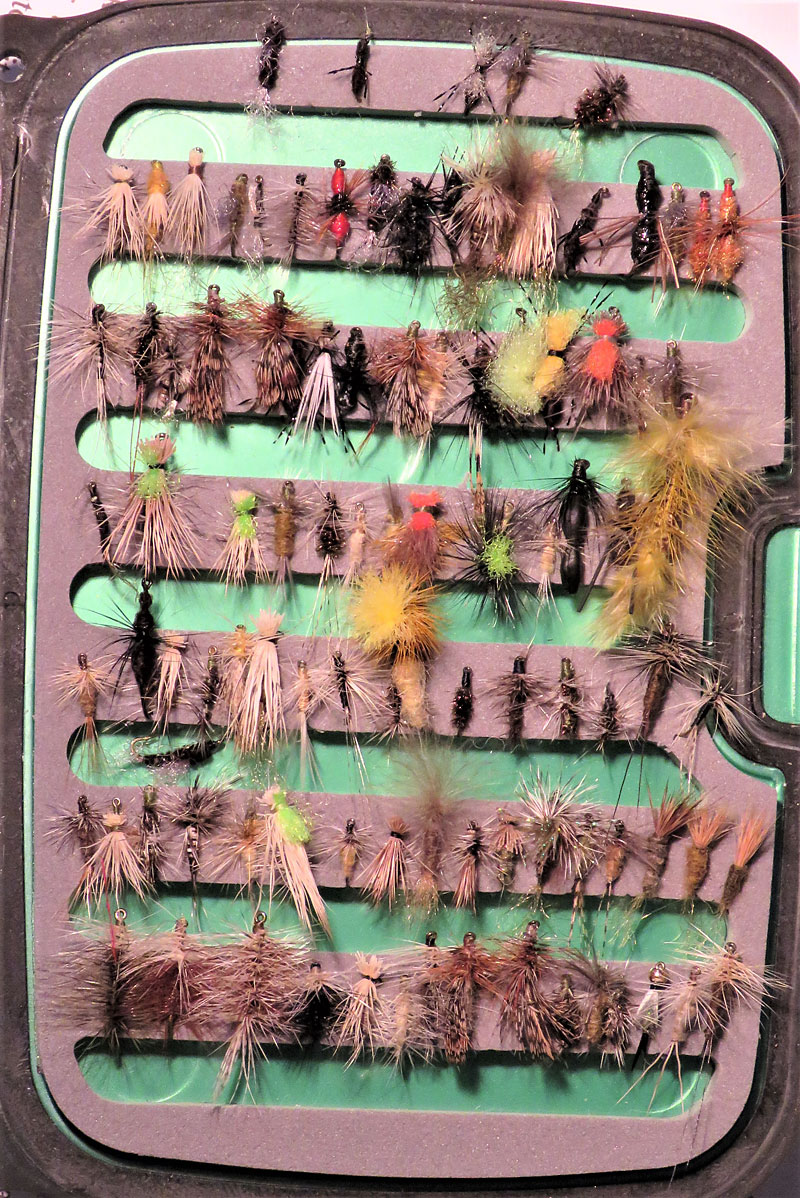
Flies fall into four major categories: dries, nymphs, terrestrials and streamers. Dry flies imitate mature insects such as mayflies, caddisflies and stoneflies. Nymphs imitate an immature stage of these same insects. Terrestrial flies are land-based insects such as grasshoppers, crickets, beetles and inchworms. Streamers imitate small fish that are the quarry of larger fish looking for a bigger meal.
 In the beginning, it is much easier to learn from a mentor than from written materials. The best scenario is to have a mentor, but read and practice on your own. When you hit a roadblock, reach out for advice. In all probability, he had the same questions earlier in his fly-tying career.
Tying flies is an interesting pursuit, and if you are expecting to do it to save money, you may be in for a shock. The real benefit of tying your own flies is that it forces you to learn more about entomology (the study of insects). The process of learning more about insects will make you a better fisherman.
Tying four favorite patterns
Each area has its own “go-to” patterns, but these four flies, one of each type, that will work throughout the country.

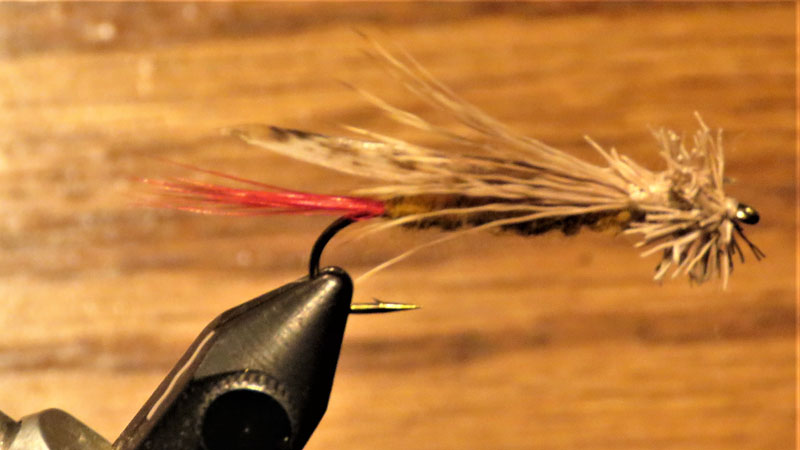
Caddis dry fly
This pattern may be tied with deer or elk hair on standard dry fly hook sizes from No. 10 to No. 20. Attach hackle with desired color thread, near the bend of the hook. The hackle should be slightly wider than the gap of the hook. Apply dubbing wax to thread, apply Hare’s Ear dubbing and wrap around shank of hook. Spiral wrap hackle around the hook, over the dubbing. Both hackle and dubbing should be secured approximately 1/8-inch behind hook eye. Attach a bundle of deer or elk hair on top of the fly, tying it off behind the hook eye. Offset the hair so as the thread tightens, it will rotate to exactly the top of the hook and flare. Light gauge wire may be wrapped over the hackle and dubbing before the next step, but is optional. Secure thread at hook eye with head cement. Griffith’s is a good choice.
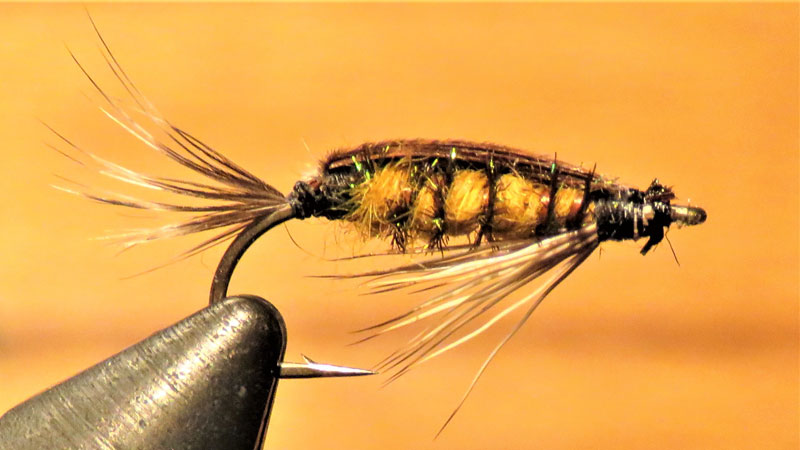
Tellico Nymph
This is an old, popular pattern that utilizes black thread dubbed with yellow fur for the body, guinea feather fibers for the tail and pheasant tail fibers for the shellback. Brown hen hackle and peacock herl is spiraled over the body. This pattern may be tied on nymph hooks, sizes No. 6 to No. 16.
Secure the tail, pheasant shellback and peacock herl. Apply dubbing. Spiral peacock herl to 1/8-inch behind hook eye and secure. Pull pheasant fibers to 1/8-inch behind eye and secure. Attach hen hackle and wrap twice behind hook eye. Secure hackle and wrap thread to form head. Apply head cement.
Letort Hopper
Grasshoppers elicit legendary strikes in late summer. The Letort Hopper is one of the easier terrestrials to tie. Use an elongated hook in size No. 10 to No. 14. Using yellow thread, dub with yellow fur or synthetic and form body, stopping ¼-inch behind hook eye. Attach an underwing of mottled turkey feather and an overwing of deer body hair. Spin the butt end of the deer hair to form a bulky head, slightly larger than the dubbed body. Secure thread behind hook eye and secure with head cement.
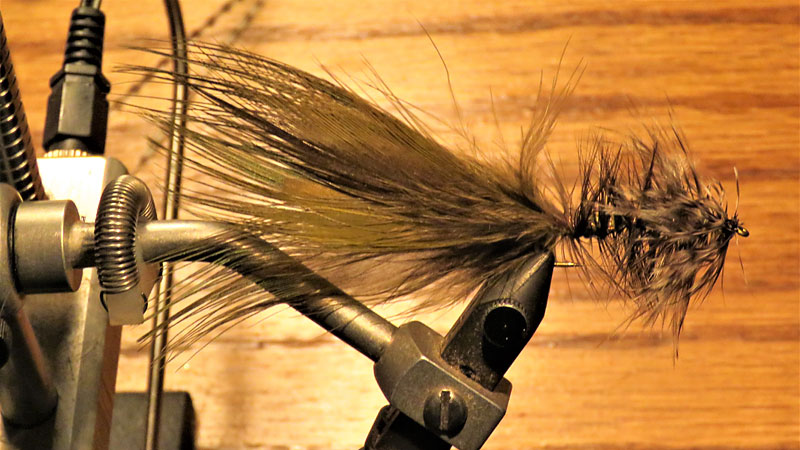
Wooly Bugger Streamer
This pattern is an all-around favorite. It should be tied on elongated streamer hooks in sizes No. 2 to No. 10. It can be tied in various colors or combinations. Using thread color to match body color, attach a tail of marabou that extends past the bend of the hook by approximately two-thirds of the hook length. In order to sink the fly, attach lead wire of desired size simultaneously as tail is attached. Also, attach chenille for body and hackle that extends well past the hook gap. Spiral wrap chenille to form body, wrap lead wire and then wrap hackle to a point 1/8-inch behind hook eye. Hackle should be wrapped and spaced evenly along body length. Form head with multiple wraps of thread and secure with head cement.


Be the first to comment