Prevent marine electrical malfunctions early on
Do you ever think about electricity when you’re fishing? If you’re like most fishermen, the answer is a flat no. That is, unless the electricity stops working. As fishermen, we have become used to having the tools and conveniences of numerous electrical devices to the point of becoming almost addicted.
All is fine until something stops working, and then the day heads downhill quickly. It is usually something simple, like a bad connection, a blown fuse or corrosion. However, only a small percentage of fishermen have the basic knowledge for troubleshooting, and most fishing situations aren’t the best places to be troubleshooting electrical issues.
My suggestion is to take the time to install things at 100 percent and reduce the likelihood of experiencing failures. DC current is actually pretty simple. Power runs from the positive side of the source to the device and returns to a common negative terminal or the negative terminal of the battery. If the device doesn’t have a switch and circuit breaker or fuse, they should be installed in the positive line between the power source and the device.
Boats come with the basics installed, but fishermen add fish finders, radios, GPS units, power anchors and more. Whether you install these units yourself or have them installed, it is imperative that all electrical connections be waterproofed for optimum service. Insist on the premium installation, and don’t look for bargains. This is one of those situations where the negatives of a minimal job will linger far after the positives of a cheap price fade away. Inexpensive installations have a tendency to fail when you need them most, and to add insult to injury, by the time you have it repaired, the expense is usually greater than doing it correctly the first time.
So you think this doesn’t pertain to you? Even fishermen standing on the bank sometimes use electricity. It may be as simple as a couple of batteries running an aerator to keep live bait healthy and frisky, but electricity has become an integral part of fishing, and connections and switches abound. There isn’t much ice fishing in North Carolina, but even ice fishermen are using GPS to locate preferred spots and portable fish finders to look beneath the ice. We may not realize it, but we’ve become dependent on electricity for fishing.
Some of my best rigging knowledge comes from setting up kayaks for fishing. Kayaks have developed to the point they have fish finders, live-bait tanks, cameras, trolling motors, remote-control anchoring systems and more. If you think this sounds like a lot of electronics, it is. However, most boats, even skiffs and small bay boats, have even more.
All these accessories require electricity that has to come from somewhere and travel through wires to the device. In the line between the source and the device, there will typically be several connections, and each one is a potential power disruption.
After loose connections, water is a primary culprit for power issues. Unfortunately, even tap water is somewhat corrosive. Make that saltwater, and the corrosion factor quadruples. If the connection is a little loose, there is a spot water can find its way into, or if the bare end of the wire protrudes from the connector, it can act like a wick to funnel water into the wire and begin corroding. If you’ve changed out a connector and found green wires, that is the beginning of corrosion. Saltwater is especially caustic, and when added to a connection with different metals, salt can cause a galvanic reaction that creates especially nasty corrosion.
So if water causes corrosion and you’re rigging a boat, there will be water around. What can you do to prevent or at least lessen the effects of corrosion boosted by contact with water? The first thing is to use tinned wire whenever possible. Tinned wire is made for marine use and has a light coating to help prevent corrosion. It is a little more expensive, but will not corrode as quickly as regular wire.
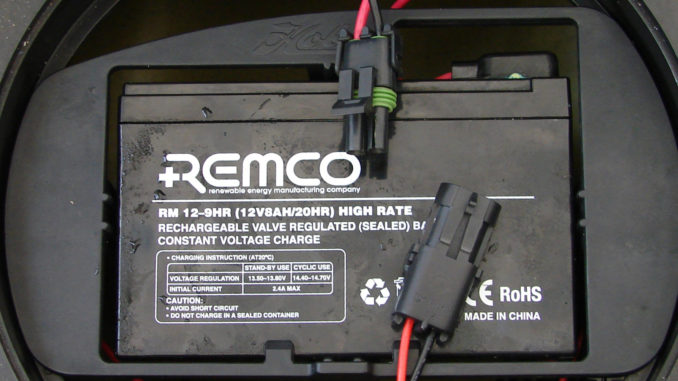
Next is to use water-resistant connectors wherever wire has to be joined or attached to a panel. There are several brands and qualities of water-resistant connectors. The thing to look for is that the end of the wire attached to the connector is completely encapsulated, and there is a gasket or heat shrink to keep water out of the connection.
Butt splices join two wires and are one of the most-common wire connections. Several companies make weatherproof or water-resistant butt splices, and they are the only ones to use on a boat. Some butt splices are filled with silicone that spreads out to cover the wires when they are crimped, while others have an outer layer of heat shrink material that is shrunk down to grip the cover of the wire after the butt splice is crimped. Both are good steps but can be improved.
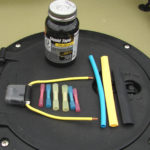
Most people would stop with either of these connectors, but I add two more steps. I prefer butt connectors that use heat to shrink and seal. Before completing the crimp, I slide another piece of heat shrink tubing up the wire a few inches. After crimping and sealing the heat shrink on the butt splice, I cover the butt splice with liquid electrical tape and allow it to set a few minutes and cure to a semi-stiff consistency. Now I slide the heat shrink tubing back down the wire and shrink it over the liquid electrical tape to have two heat-shrink seals.
This isn’t absolutely waterproof, but it’s dang close. Saltwater is like a spider; it can find any crevice to get in. It only takes a few more minutes and a little more expense to make splices this way, and it’s well worth it. This combines for three layers of protection and any crevices are sealed 99.99 percent of the time.
I treat spade and eye connections for panels similarly. If there is any wire exposed through the crimp of the connection, I cover it with liquid electrical tape so corrosion can’t begin from that end. Marine or Plumber’s Goop is a reasonable substitute for liquid electrical tape to coat wire ends, and some people find its thicker consistency easier to use.
Any electrical slip connection should be watertight. Waterproof would be better, but that’s tough to achieve. Several brands of slip connectors have an accordion, boot-style gasket on the end, and they do a good job of keeping water out. I run some dielectric grease around the gasket seam for protection.
Speaking of dielectric grease, it is good to have a light coating of dielectric grease on all electrical connections that are occasionally unplugged and plugged back in. I use a Q-Tip and coat the screws and eyes on electrical panels. Dielectric grease works as a coating to help prevent corrosion caused by salt reaching stainless steel screws in panels of different metals.
It is wise to protect the unused connections on the back of fish finders and other marine electronics. Some electronics are permanently flush-mounted to remain on the boat, while others are removed after each trip. Either way, any exposed connectors are subject to corrosion from exposure to the elements, humidity and condensation.
Few fishermen use all the network connections on the back of their marine electronics. Some manufacturers include plugs for the connections not used, but many don’t. Even with the connections that have covering plugs, a light dab of dielectric grease before sealing it helps a lot. For those connections without sealing plugs, I find an appropriate size chair leg cap and use it to seal the connection after applying a light coat of dielectric grease.
Wire ends are a little different. If the unit stays on the boat, they stay connected, but they are left exposed if the unit is removed. I remove the units on my kayaks and boat and use plastic vitamin jars as simple, inexpensive and effective electrical connector covers for when the electronics aren’t connected.
Making the connector cover really is easy. Start by drilling a hole in the middle of the cap the same size as the wire and make a straight cut from the edge of the cap to the hole. Put the connector on the thread side of the cap and work the wire down the cut to the hole. Adjust the wire length so the connector doesn’t quite reach the bottom of the jar with the cap screwed on.
Spread a thin bead of Goop along the cut on the outside of the cap and around the wire at the cap. Also, lightly coat the cut on the flat part and around the wire inside the cap with a light covering of Goop, but don’t get any on the threads. Once the Goop sets, the vitamin jar will be watertight storage for the connector while the electronics aren’t attached.
I apply a light smear of dielectric grease over the end of female connections and use a Q-tip to lightly coat the pins of male connections for extra protection. Don’t use too much or it will be difficult seating the connection. You can also add a small desiccant bag in the vitamin jar for condensation protection.
Some of my fishing buddies think I go overboard when making electrical connections. Maybe so, but I rarely have electrical issues, so that makes it worth a little extra time and expense to me. It will work for you also.


Be the first to comment